Autor Tema: Guia para desmontar un Star L85  (Leído 10172 veces)

Desconectado BrusBilis

  • Airsofter
  • *
  • Mensajes: 841
  • Karma: +0/-0
Guia para desmontar un Star L85
« en: Julio 22, 2008, 12:21:35 pm »
I wanted to do some upgrade work on my Star L85 and figured I'd make a disassemby guide complete with a review of the internals. While reading, keep in mind that the gun is pretty new but has seen some good action -it has about 5000 rounds on the stock (or equivalent) spring running on a 11.1v lipoly the whole time.

I have read/seen a couple disassembly guides which were seeming vague about certain steps or just failed to mention certains steps altogether. Anyway, without further ado...

1.) Take out the main sling strap/foregrip screw and slide the front handguard off. If you need a picture for this, do not continue as you should not be doing this alone. LOL

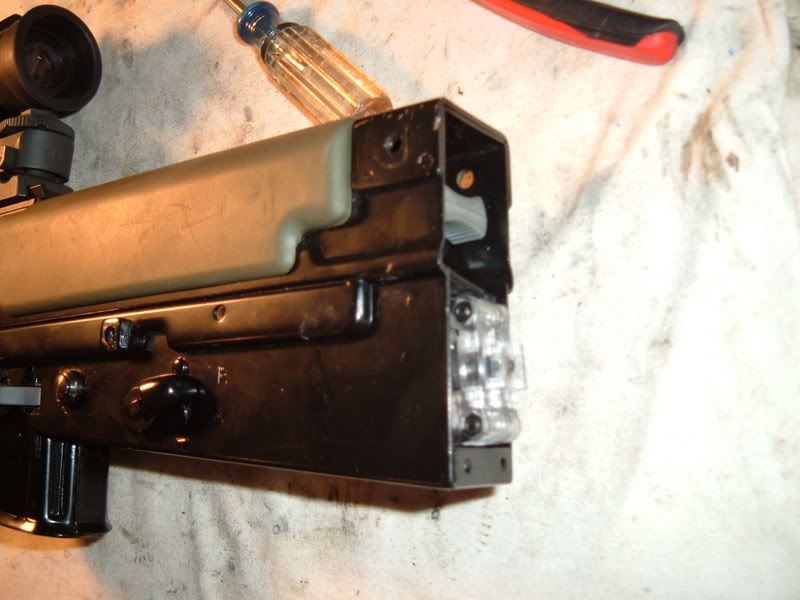
2.) Take off the buttstock pad and support pin:
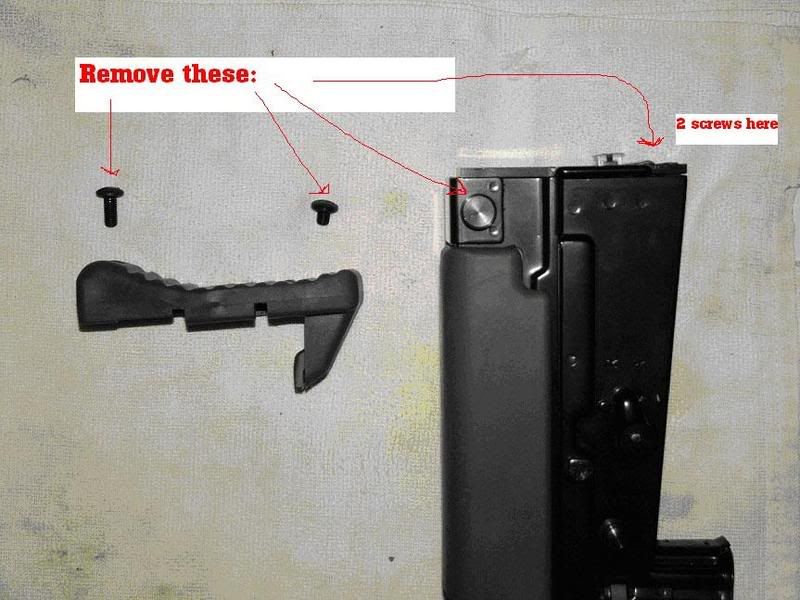


3.) Take out the four screws on the front of the metal top frame:
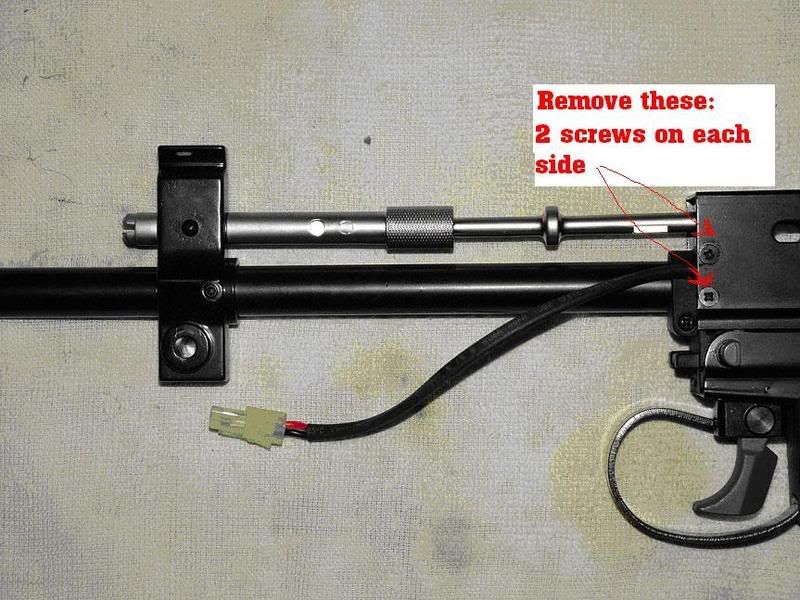

4.) Take out the pin just in front of the mag well. It does not unscrew but rather is punched through.
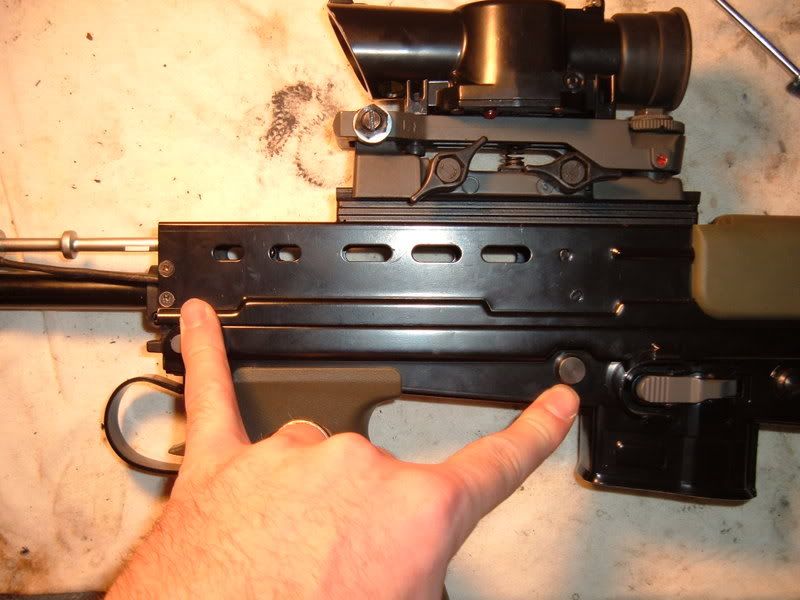

5.) You can now remove the top metal frame and expose the gearbox:
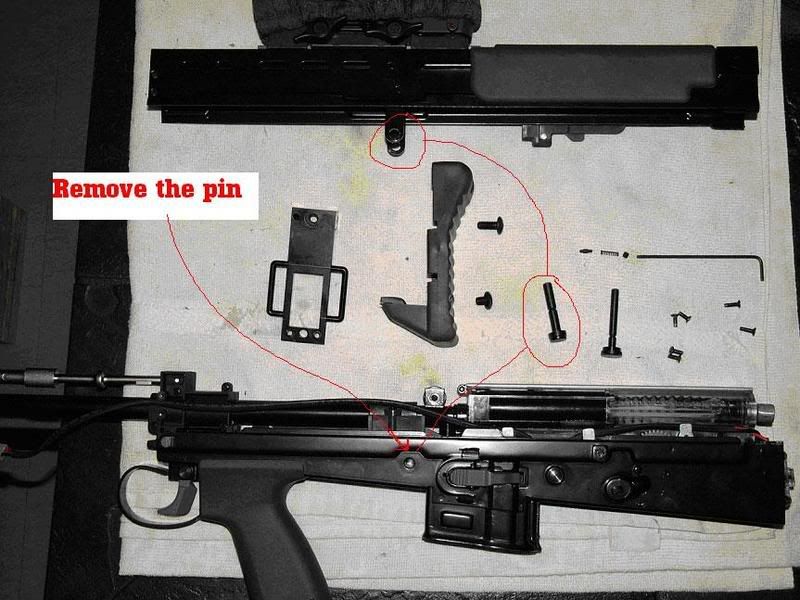

6.) Remove the hop up/outer barrel support bracket:
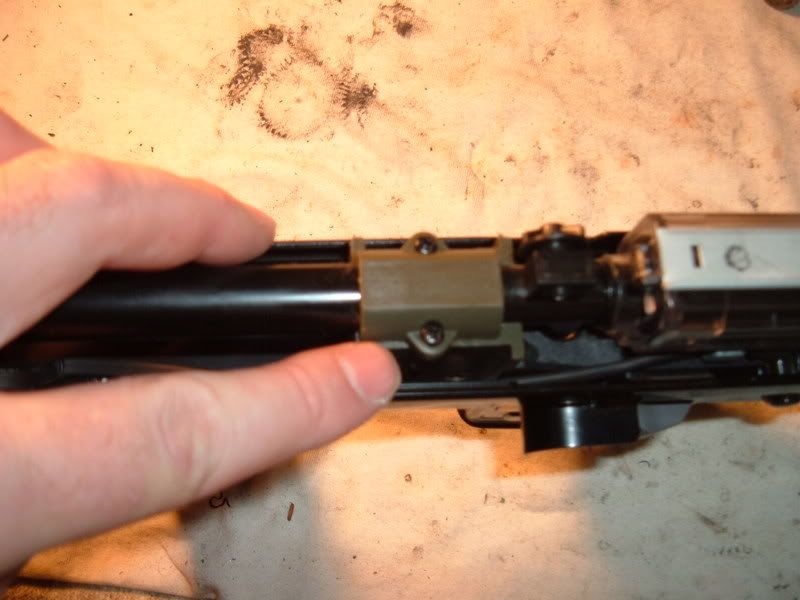

7.) Remove the gearbox mounting bolts. There are two of them -one on each side. The are positioned behind the magwell. The are screws and have standard threading. Turn CCW to unscrew. They may be tight. I had to carefully use pliars.
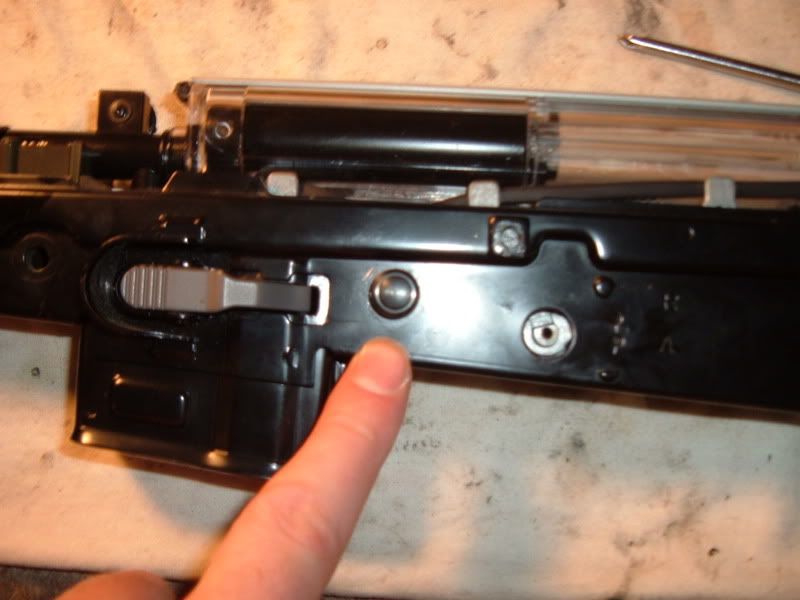
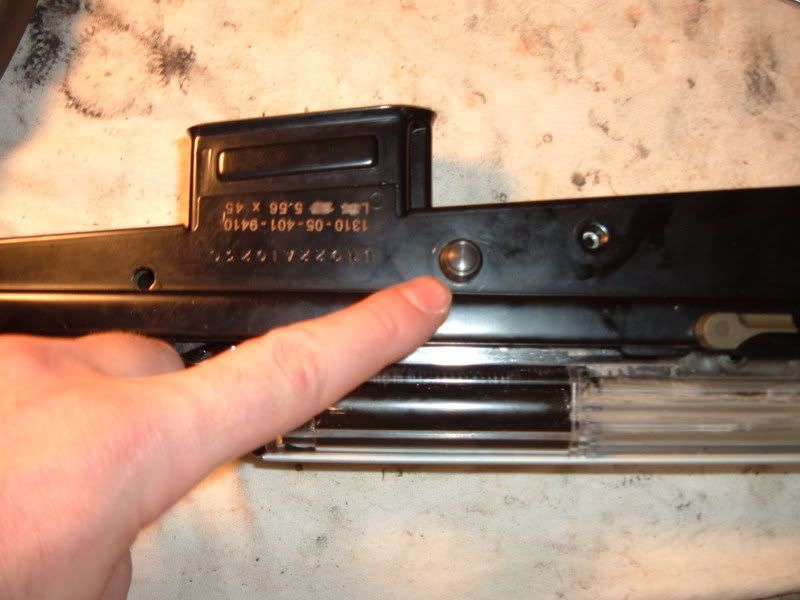

8.) Remove the mounting bolt opposite the selector switch lever. It unscrews to reveal another bolt used to secure the lever. Remove the screws and disassemble the selector lever taking note of the assembly pattern. Also be careful not to lose the spring and ball bearing used to provide positive locking between firing modes.
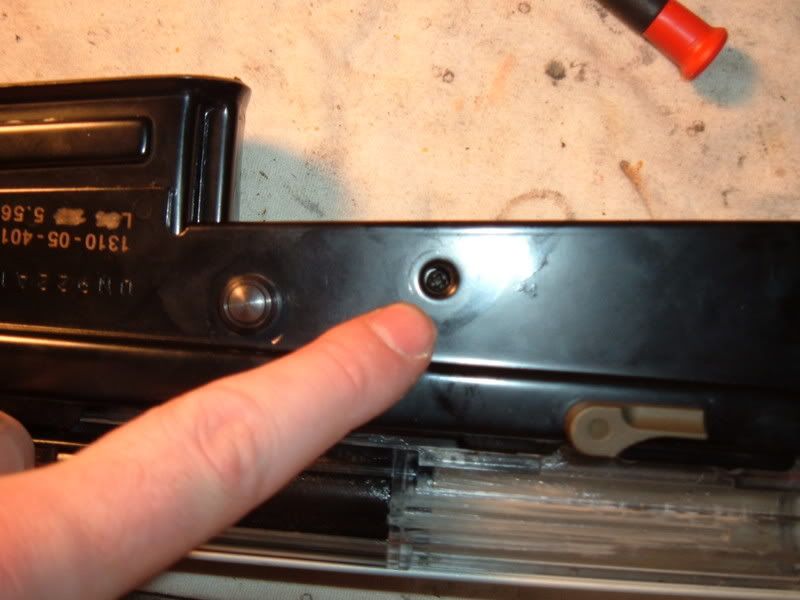
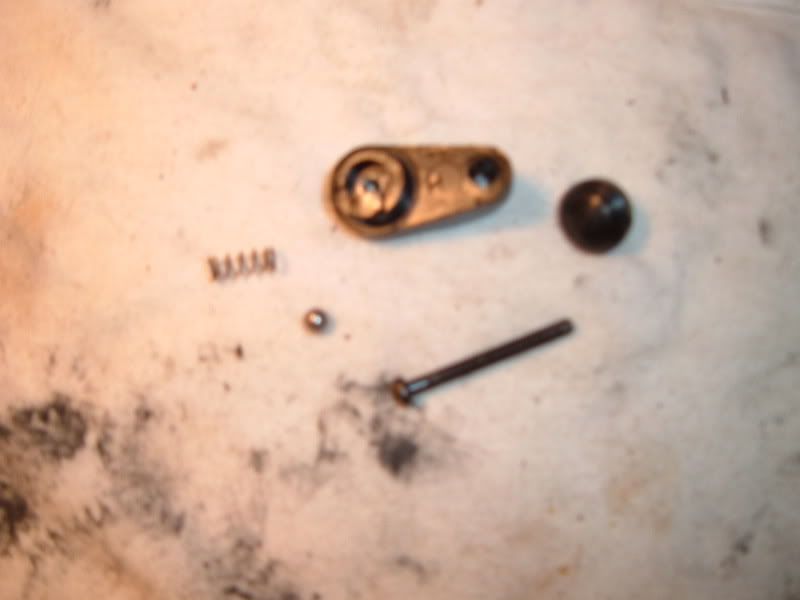

9.) The gearbox is now ready to come out. Gently lift up on the rear of the gearbox. The very front of the gun's frame as a hinge-like movement capability.
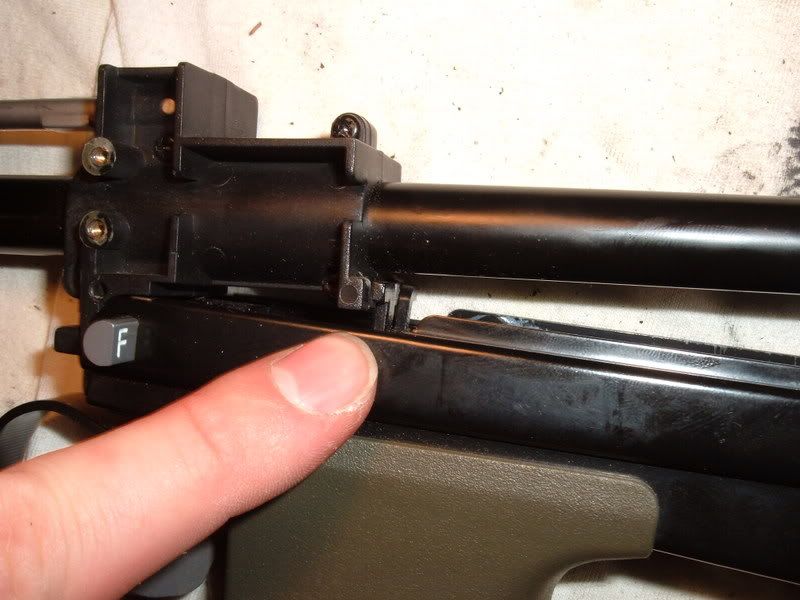

10.) Once the hopup unit has cleared the magwell plastics, slide everything (gearbox/hopup/barrel) out of the outer barrel and gun. The hopup is integrated with the gearbox.
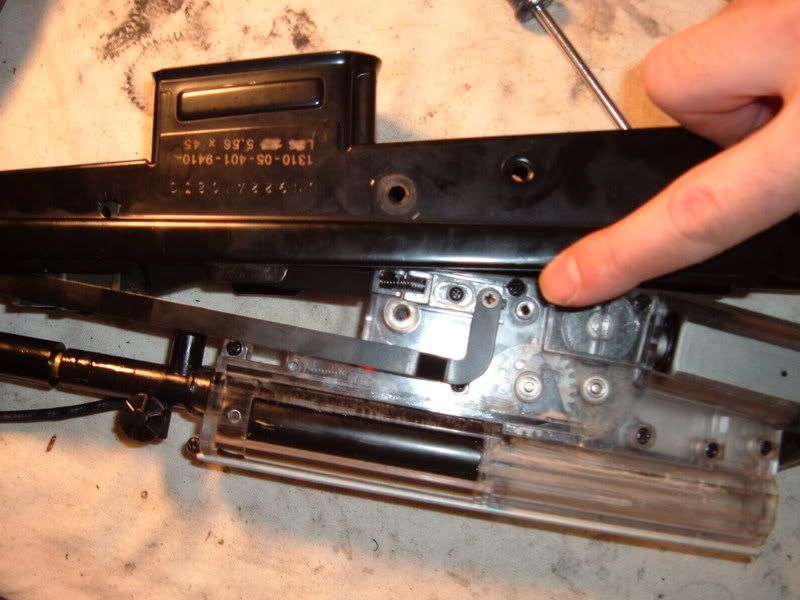
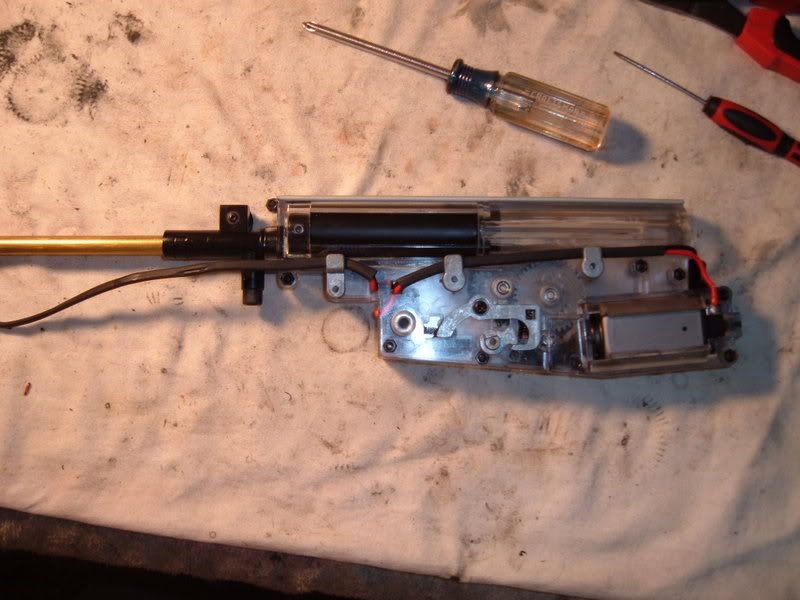

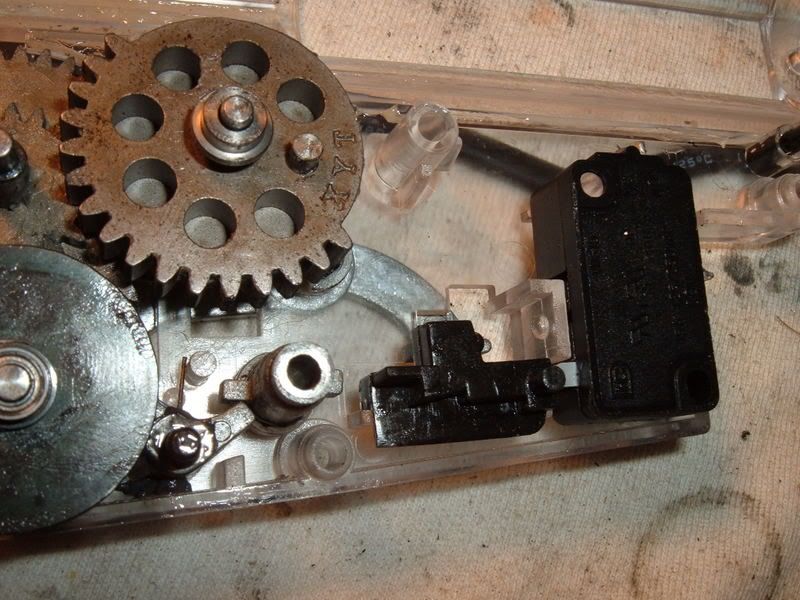
11.) Once the gearbox is out, watch out for a few of the unique mechanisms:
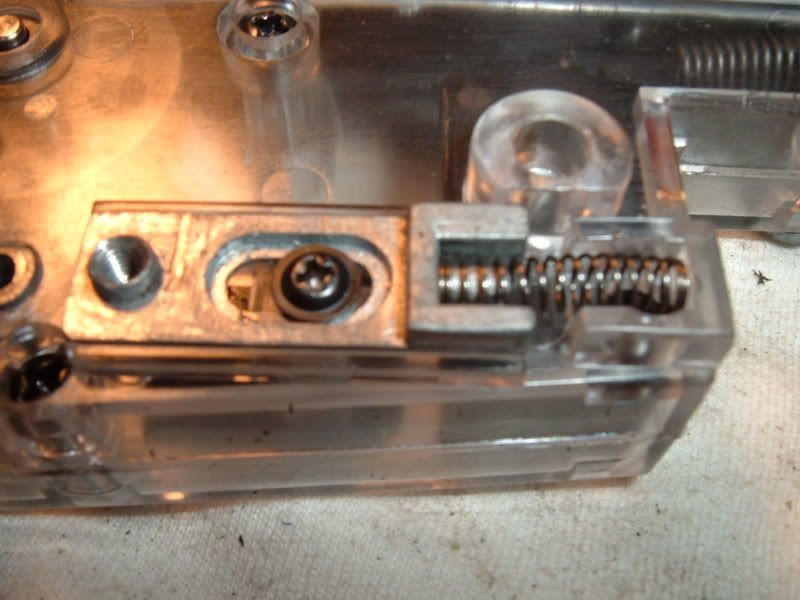
The electrical switch actuator/mechanism:

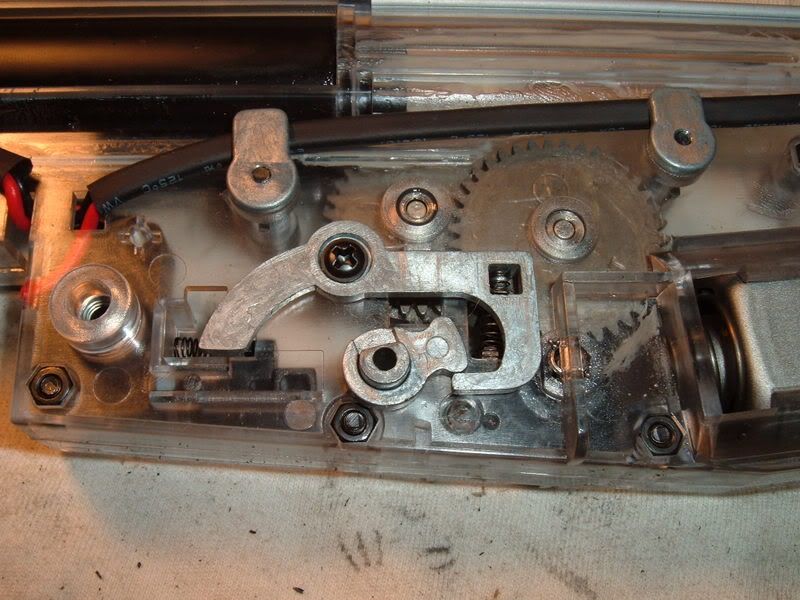
The selector switch mechanism with enables full auto:

12.) Aside for those the gearbox separates pretty easily. The screws have nuts on the opposing ends instead of screwing into the sides (b/c the plastic/polycarbonate mechbox material). Before splitting the mechbox halves, remove the spring via the quick spring change in order to relieve the spring’s tension. Here’s a few internal pics:
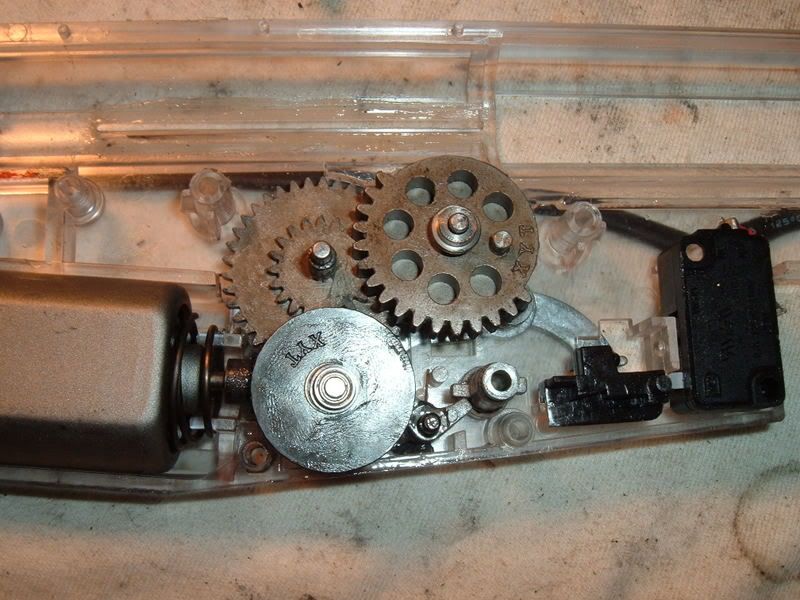

On my gun, the internals were nicely lubed and the gears/piston looked in VERY good shape for using the 11.1v lipoly for it’s whole life so far. Notice how perfect the teeth are:


13.) Although there were some good things, there were some bad areas to note. I’m not sure if it was the previous owner (it probably was b/c I doubt it comes stock this way), but bearings were installed on the bevel gear. I don’t like bearing/bushings b/c they explode…and that’s what happened on one of them. Amazingly, no further damage occurred to the gears’ teeth or anything else in the gearbox. In addition, the shims themselves were of very poor quality. The ones on the spur and sector gears looked ok, but the bevel gear’s ones were misaligned and bent.


Another area of “concern” was the poor compression and hard impact surfaces of the piston head/cylinder head combo. I can easily see why the gun was so loud; the ‘buffer’ material on the cylinder head was more plasticy (shiney too) that it was rubber. Accordingly, it did not offer very much impact absorption. I was also surprised at the poor compression btw the piston head and cylinder; I though it would have been better given the high stock FPS. I venture to guess that an additional 15-20 FPS could be attained by fixing the compression issue there.


14.) There were a few unique specs to a few parts that will make replacing parts difficult. The gears, piston, piston head, motor (short type), and cylinder are standard parts. However, the tappet plate, nozzle, hop up unit, and cylinder head are unique. Other gearbox versions may be compatible but I cannot not say for sure due to my lack of familiarity with other versions (ie V1, V6, etc). Here are a few pics:


The bevel gear is one of the newer type that features a long ‘neck’ for the anti-reversal latch to hook into. Other types should be compatible though.


The hop up unit is unique b/c it is connected to the gearbox. It has a lip that locks it into place with the cylinder head/nozzle in place. I forgot to get a pic of this one but I’ll grab one later. Anyway, you will need to open the mechbox if you had to remove the hop up unit but I don’t see this as ever being necessary. Even if you are changing barrels, you can do so with the hop up unit still attached. The unit itself is very basic and reminds me of the AK hop up style.

I plan on upgrading the piston head, replacing the ‘buffer’ material on the cylinder head (probably have to do something custom there), replacing the bushings on the bevel gear, installing a new hop up bucking, and installing a tightbore barrel. I guess that’s it for now.
Perdona bonita, pero yo solo hablo dos idiomas: normal y con tacos

Desconectado DEVILHUNTER

  • Veterano
  • **
  • Mensajes: 2.477
  • Karma: +0/-0
Re: Guia para desmontar un Star L85
« Respuesta #1 en: Julio 22, 2008, 03:11:37 pm »
La guia esta muy bien, pero por eso de no aplastar el trabajo que hacen los demás podías poner su autor y de donde la sacaste  ;)

Desconectado BrusBilis

  • Airsofter
  • *
  • Mensajes: 841
  • Karma: +0/-0
Re: Guia para desmontar un Star L85
« Respuesta #2 en: Julio 22, 2008, 03:38:32 pm »
Cazadiablos, tiene usted razon  :-* :-*

Link de la review : Es una pagina con cositas muy interesantes

http://forums.airsoftmechanics.com/index.php?topic=459.0

Autor : cjfield1129
Perdona bonita, pero yo solo hablo dos idiomas: normal y con tacos

Desconectado fulminatorix

  • Airsofter
  • *
  • Mensajes: 808
  • Karma: +0/-0
Re: Guia para desmontar un Star L85
« Respuesta #3 en: Diciembre 28, 2009, 11:30:51 am »
Gracias por el aporte Brusbilis.Me viene al pelo.

Desconectado kilgore

  • Veterano
  • Airsofter
  • ***
  • Mensajes: 1.143
  • Karma: +0/-0
Re: Guia para desmontar un Star L85
« Respuesta #4 en: Enero 03, 2010, 06:34:56 pm »
   Buen manual, ya lo conocía, aunque ha decir verdad me gustaría que estuviera escrito en la lengua de “Cervantes” cuando he posteado en foros extranjeros y he puesto alguna alusión en español, se me ha borrado rápidamente, y se me explico que debería estar escrito en la lengua del país al que pertenece el foro, siempre lo comprendí y además lo veo lógico, por lo tanto……Si nosotros no nos hacemos respetar…………

Feliz navidad…

Desconectado Dadaista

  • Novato
  • Mensajes: 136
  • Karma: +0/-0
Re: Guia para desmontar un Star L85
« Respuesta #5 en: Enero 04, 2010, 10:22:01 am »
Hombre... ya que se ha hecho un Copy & Paste... que menos que traducirlo para el personal... digo yo vamos! ;)

Salud!
Ahora tu destino, tiene otro color.
El negro del acero de mi Kalashnikov

Desconectado TKGO

  • Cada vez que comprais un m4 un gatito muere.
  • Airsofter
  • *
  • Mensajes: 1.004
  • Karma: +0/-0
Re: Guia para desmontar un Star L85
« Respuesta #6 en: Marzo 11, 2011, 07:12:53 pm »
reabro el post para preguntar unca cosilla, se me ha desgastado la cabeza de piston, nose si es standard o especifica, y ya de paso me gustaria ponerle unos engranages que aumentaran la cadencia que me recomendais?¿

gracias
m249 saw,l86 a2 star, mk43 star, mk43 A&K, m60 vn A&K, Rpkm homecustom, AK74U, blaser r93 king arms 1911kwc y mk23 socom TM

Desconectado piercing58

  • Veterano
  • **
  • Mensajes: 4.081
  • Karma: +0/-0
    • http://www.facebook.com/AddictiveTattooPiercing
Re: Guia para desmontar un Star L85
« Respuesta #7 en: Marzo 11, 2011, 08:00:35 pm »
reabro el post para preguntar unca cosilla, se me ha desgastado la cabeza de piston, nose si es standard o especifica, y ya de paso me gustaria ponerle unos engranages que aumentaran la cadencia que me recomendais?¿

gracias

La marca SHS es tu HamiJa... vende piezas específicas para el L85...

Desconectado TKGO

  • Cada vez que comprais un m4 un gatito muere.
  • Airsofter
  • *
  • Mensajes: 1.004
  • Karma: +0/-0
Re: Guia para desmontar un Star L85
« Respuesta #8 en: Marzo 13, 2011, 06:43:01 pm »
en que tienda podria encontrarlas?¿
m249 saw,l86 a2 star, mk43 star, mk43 A&K, m60 vn A&K, Rpkm homecustom, AK74U, blaser r93 king arms 1911kwc y mk23 socom TM

Desconectado piercing58

  • Veterano
  • **
  • Mensajes: 4.081
  • Karma: +0/-0
    • http://www.facebook.com/AddictiveTattooPiercing
Re: Guia para desmontar un Star L85
« Respuesta #9 en: Marzo 13, 2011, 11:15:32 pm »
http://shop.ehobbyasia.com/shs-high-speed-all-steel-gear-set-for-l85-aeg.html

Y me suena que pistones y tal también (pero tienen 300.000 modelos con más o menos dientes y no llego a tanto), lo de la cabeza del pistón, creo que era v2... I repeat CREO...

Desconectado TKGO

  • Cada vez que comprais un m4 un gatito muere.
  • Airsofter
  • *
  • Mensajes: 1.004
  • Karma: +0/-0
Re: Guia para desmontar un Star L85
« Respuesta #10 en: Octubre 16, 2011, 06:06:30 pm »
refloto el post para decir un par de cosillas

esta replica es de lo mas duro que he visto en mi vida, la he hecho mil perrerias y en 2 años solo he tenido una averia simple...


muy recomendable

saludos
m249 saw,l86 a2 star, mk43 star, mk43 A&K, m60 vn A&K, Rpkm homecustom, AK74U, blaser r93 king arms 1911kwc y mk23 socom TM

Desconectado fulminatorix

  • Airsofter
  • *
  • Mensajes: 808
  • Karma: +0/-0
Re: Guia para desmontar un Star L85
« Respuesta #11 en: Octubre 17, 2011, 08:56:18 pm »
A mí también me está dando un resultado excelente.Esta réplica y mi SCAR de vfc son las  réplicas con las que juego habitualmente.La única avería ha sido el desgaste de las escobillas del motor.
Lástima que ya no la fabriquen.